[简体中文](ml_classification.md) | English
# PaddleX Multi-Label Classification Task Data Annotation Tutorial
This section will introduce how to use [Labelme](https://github.com/wkentaro/labelme) and [PaddleLabel](https://github.com/PaddleCV-SIG/PaddleLabel) annotation tools to complete data annotation for multi-label classification tasks with a single model.
Click on the above links to install the annotation tools and view detailed usage instructions by referring to the homepage documentation.
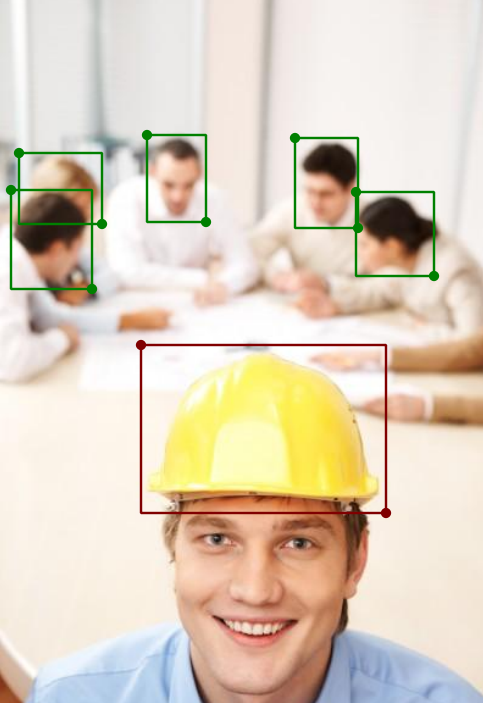
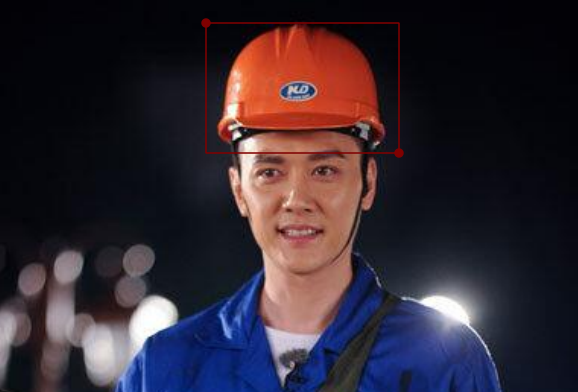
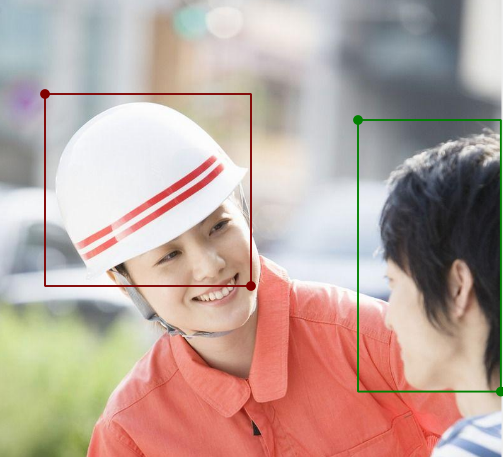
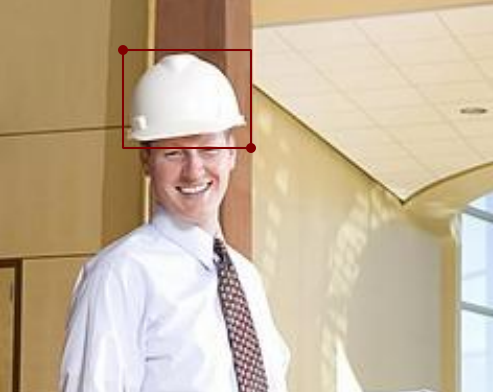
## 1. Annotation Data Example
This dataset is manually collected, covering two categories: safety helmets and human heads, with photos taken from different angles. Image examples:
## 2. Labelme Annotation
### 2.1 Introduction to Labelme Annotation Tool
`Labelme` is a Python-based image annotation software with a graphical user interface. It can be used for image classification, object detection, image segmentation, and other tasks. In object detection annotation tasks, labels are stored as `JSON` files.
### 2.2 Labelme Installation
To avoid environment conflicts, it is recommended to install in a `conda` environment.
```bash
conda create -n labelme python=3.10
conda activate labelme
pip install pyqt5
pip install labelme
```
### 2.3 Labelme Annotation Process
#### 2.3.1 Prepare Data for Annotation
* Create a root directory for the dataset, e.g., `helmet`.
* Create an `images` directory (must be named `images`) within `helmet` and store the images to be annotated in the `images` directory, as shown below:
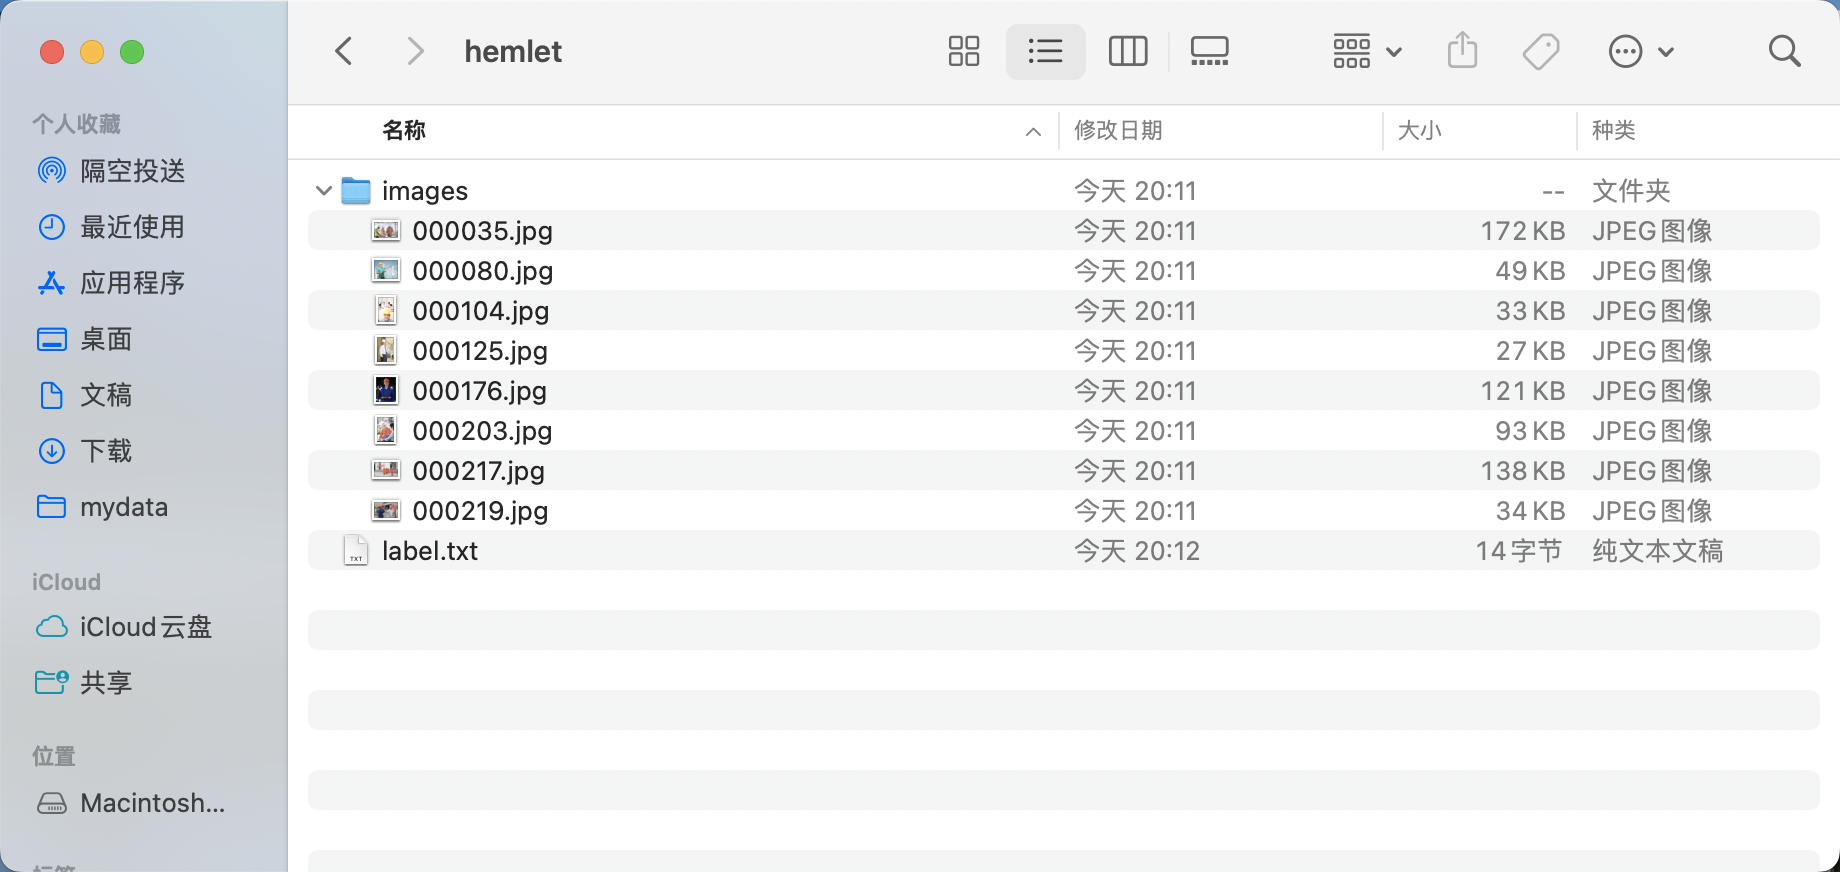
* Create a category label file `label.txt` in the `helmet` folder and write the categories of the dataset to be annotated into `label.txt` by line. For example, for a helmet detection dataset, `label.txt` would look like this:

#### 2.3.2 Start Labelme
Navigate to the root directory of the dataset to be annotated in the terminal and start the `Labelme` annotation tool:
```bash
cd path/to/helmet
labelme images --labels label.txt --nodata --autosave --output annotations
```
* `flags` creates classification labels for images, passing in the label path.
* `nodata` stops storing image data in the `JSON` file.
* `autosave` enables automatic saving.
* `output` specifies the storage path for label files.
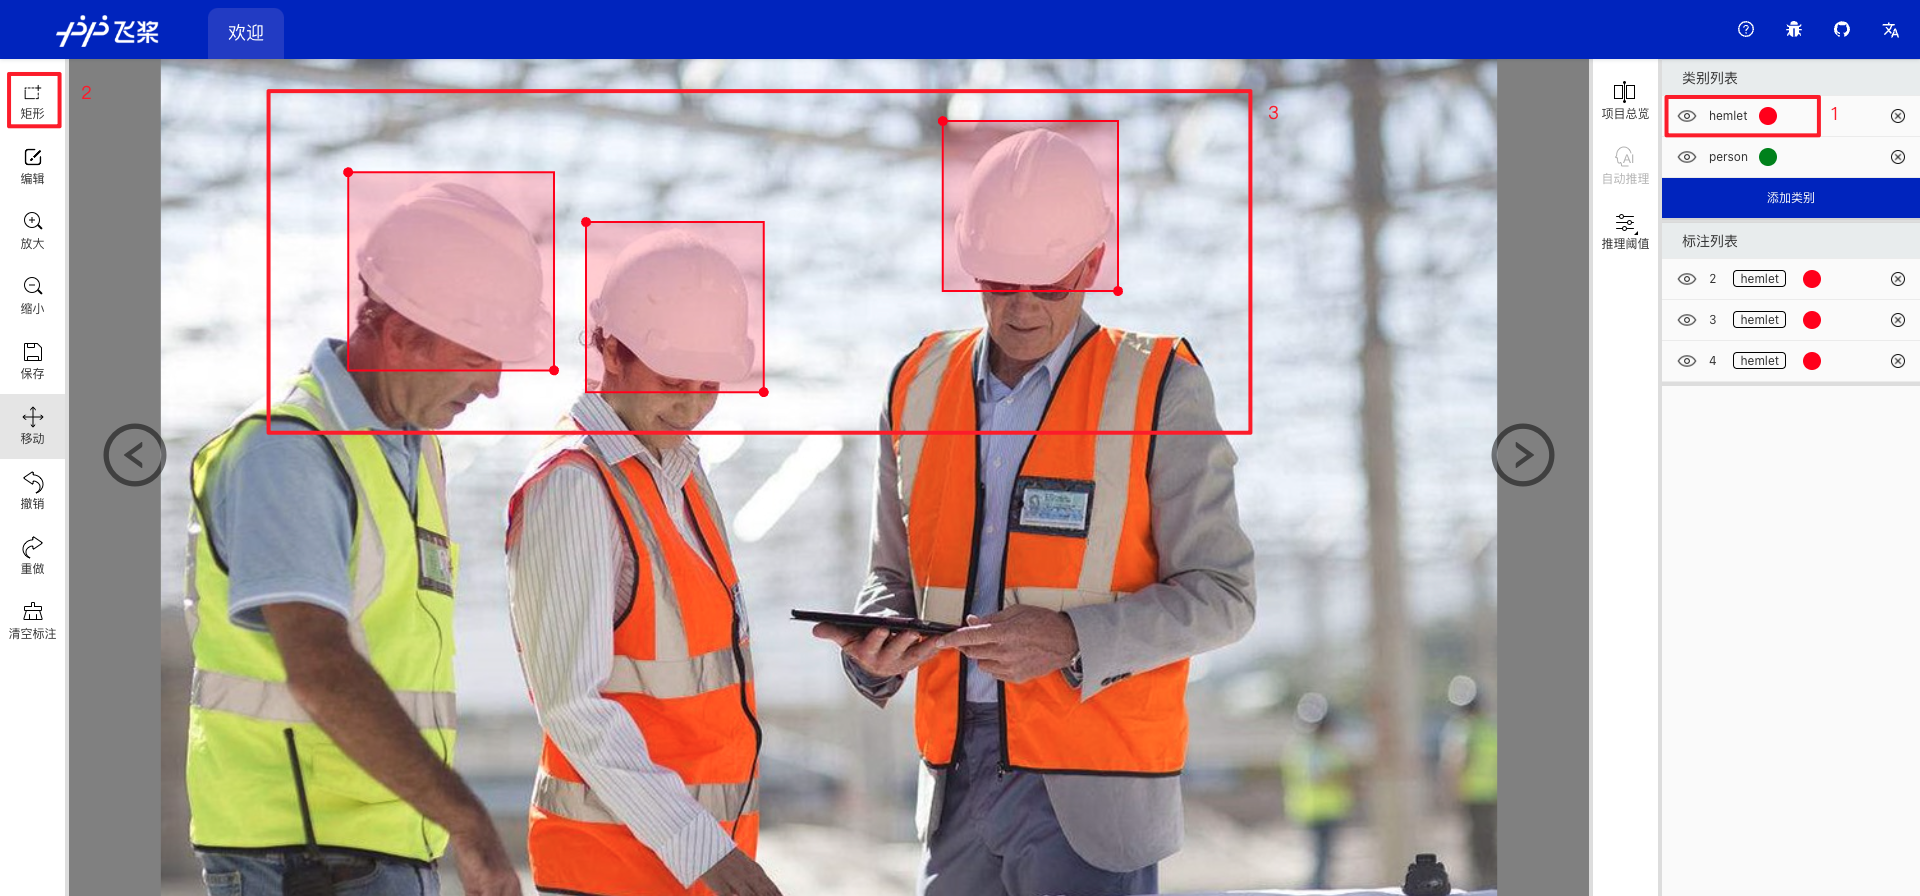
#### 2.3.3 Begin Image Annotation
* After starting `Labelme`, it will look like this:
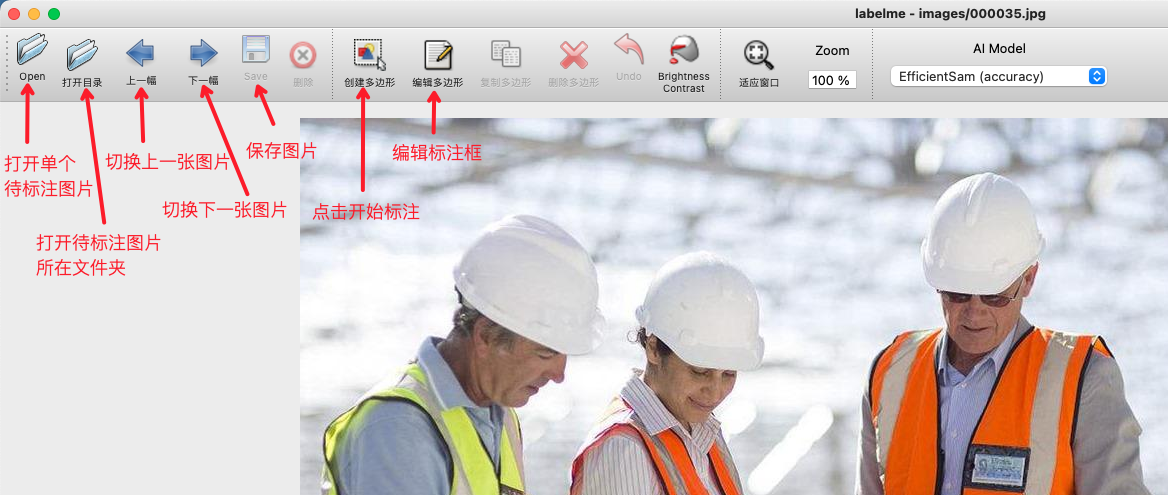
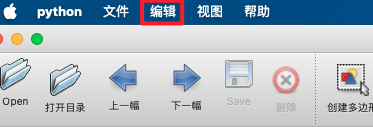
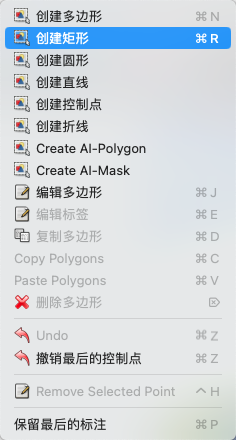
* Click "Edit" to select the annotation type.
* Choose to create a rectangular box.
* Drag the crosshair to select the target area on the image.

* Click again to select the category of the target box.
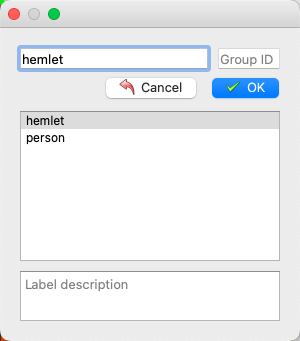
* After labeling, click Save. (If the `output` field is not specified when starting `Labelme`, it will prompt you to select a save path the first time you save. If the `autosave` field is used for automatic saving, there is no need to click the Save button).
* Then click `Next Image` to label the next image.
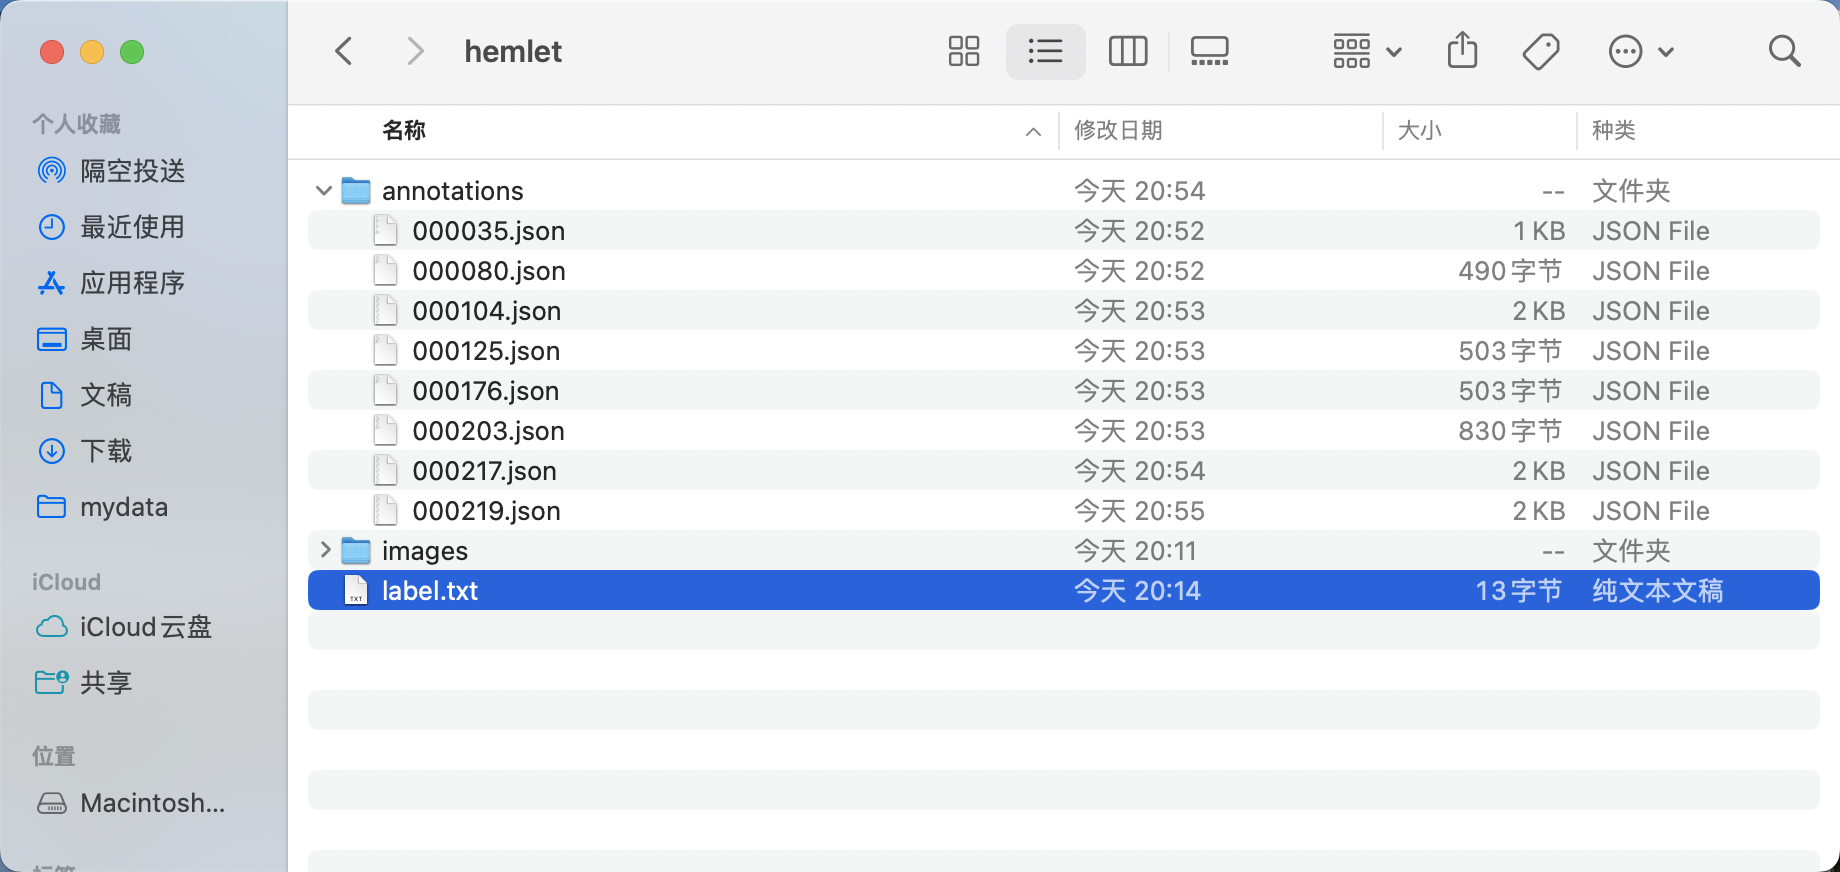
* The final labeled tag file looks like this:
* Adjust the directory to obtain the safety helmet detection dataset in the standard `Labelme` format
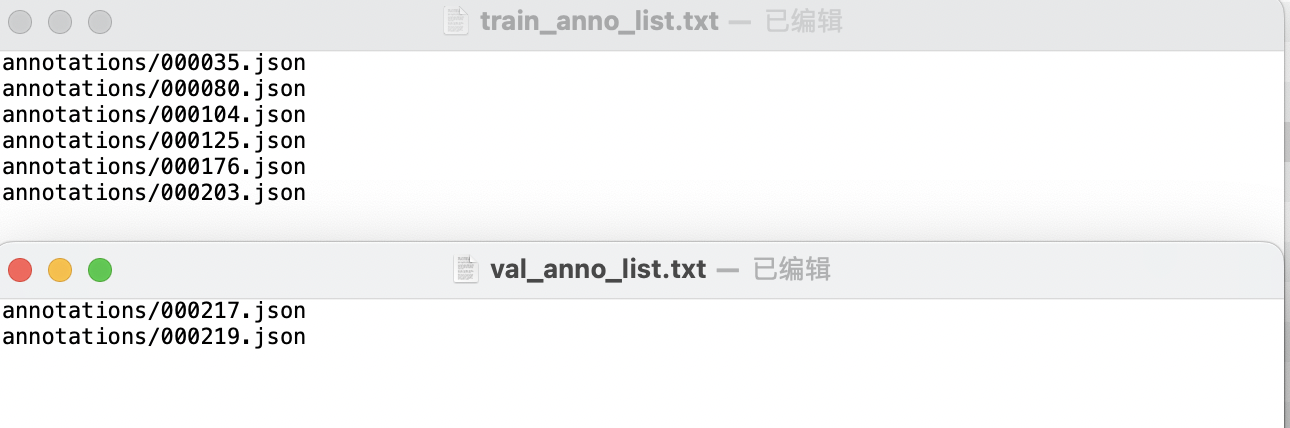
* Create two text files, `train_anno_list.txt` and `val_anno_list.txt`, in the root directory of the dataset. Write the paths of all `json` files in the `annotations` directory into `train_anno_list.txt` and `val_anno_list.txt` at a certain ratio, or write all of them into `train_anno_list.txt` and create an empty `val_anno_list.txt` file. Use the data splitting function to re-split. The specific filling format of `train_anno_list.txt` and `val_anno_list.txt` is shown below:
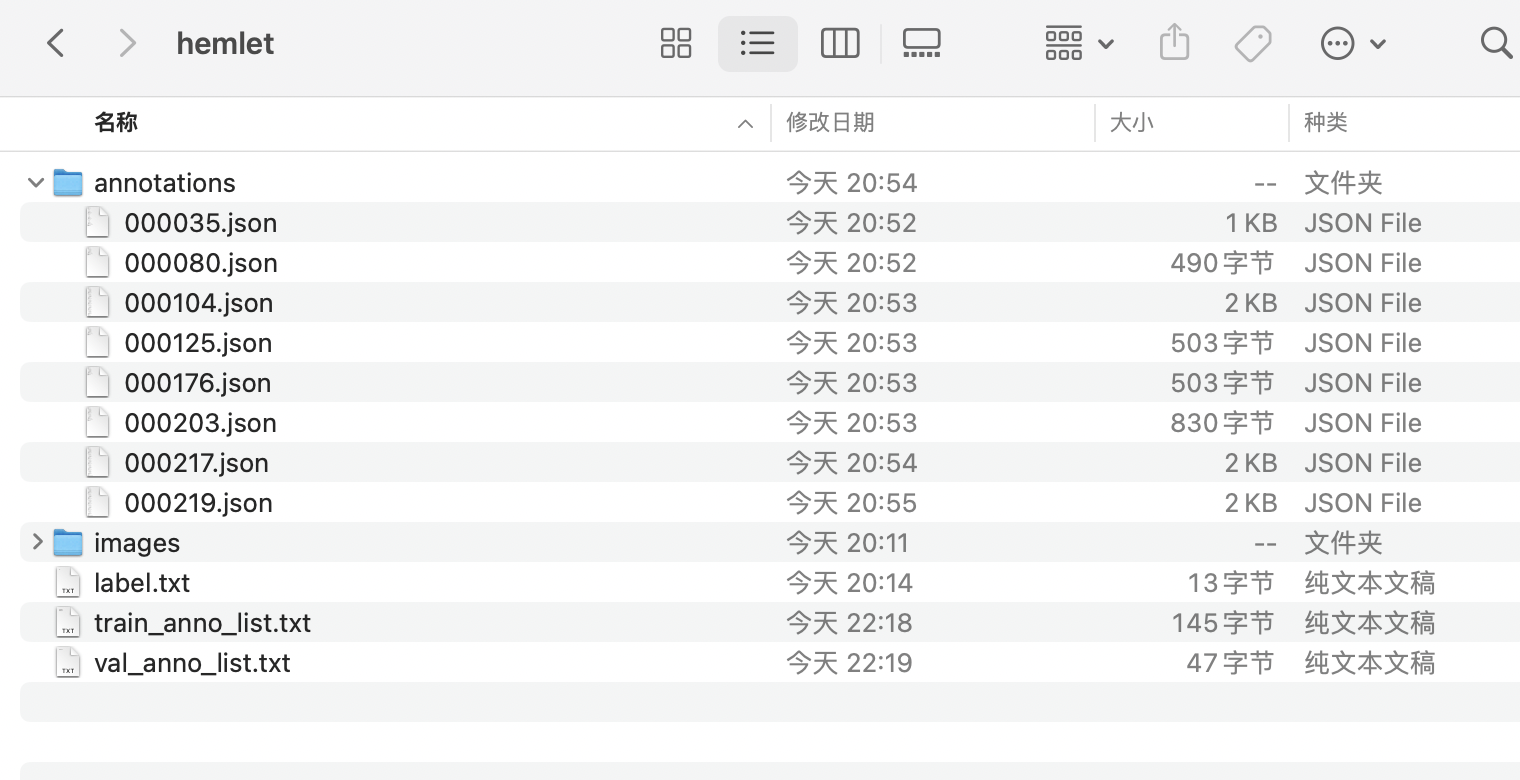
* The final directory structure after organization is as follows:
#### 2.3.4 Format Conversion
After labeling with `Labelme`, the data format needs to be converted to `coco` format. Below is a code example for converting the data labeled using `Labelme` according to the above tutorial:
```bash
cd /path/to/paddlex
wget https://paddle-model-ecology.bj.bcebos.com/paddlex/data/det_labelme_examples.tar -P ./dataset
tar -xf ./dataset/det_labelme_examples.tar -C ./dataset/
python main.py -c paddlex/configs/obeject_detection/PicoDet-L.yaml \
-o Global.mode=check_dataset \
-o Global.dataset_dir=./dataset/det_labelme_examples \
-o CheckDataset.convert.enable=True \
-o CheckDataset.convert.src_dataset_type=LabelMe
```
## 3. PaddleLabel Annotation
### 3.1 Installation and Startup of PaddleLabel
* To avoid environment conflicts, it is recommended to create a clean `conda` environment:
```bash
conda create -n paddlelabel python=3.11
conda activate paddlelabel
```
* It can also be installed with `pip` in one step
```bash
pip install --upgrade paddlelabel
pip install a2wsgi uvicorn==0.18.1
pip install connexion==2.14.1
pip install Flask==2.2.2
pip install Werkzeug==2.2.2
```
* After successful installation, you can start PaddleLabel using one of the following commands in the terminal:
```bash
paddlelabel # Start paddlelabel
pdlabel # Abbreviation, identical to paddlelabel
```
`PaddleLabel` will automatically open a webpage in the browser after starting. Next, you can start the annotation process based on the task.
### 3.2 Annotation Process with PaddleLabel
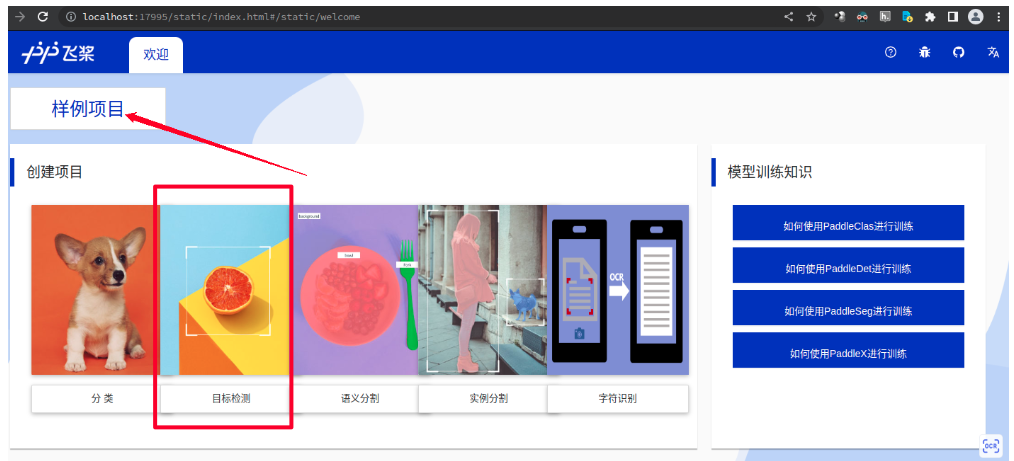
* Open the automatically popped-up webpage, click on the sample project, and click on Object Detection.
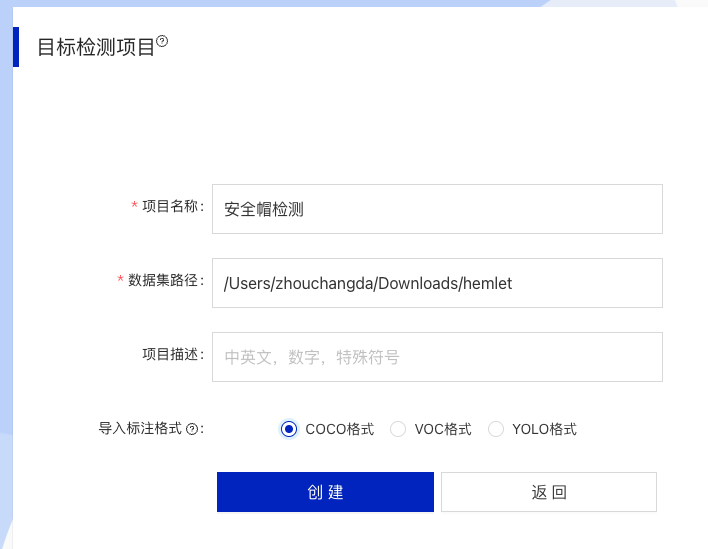
* Fill in the project name and dataset path. Note that the path is the absolute path on the local machine. Click Create after completion.
* First, define the categories that need to be annotated. Taking layout analysis as an example, provide 10 categories, each with a unique corresponding id. Click Add Category to create the required category names.
* Start annotating
* Select the label you want to annotate with.
* Click the rectangular selection button on the left.
* Draw a bounding box around the desired region in the image, ensuring semantic partitioning. If there are multiple columns, annotate each separately.
* After completing the annotation, the result will appear in the lower-right corner. Check if the annotation is correct.
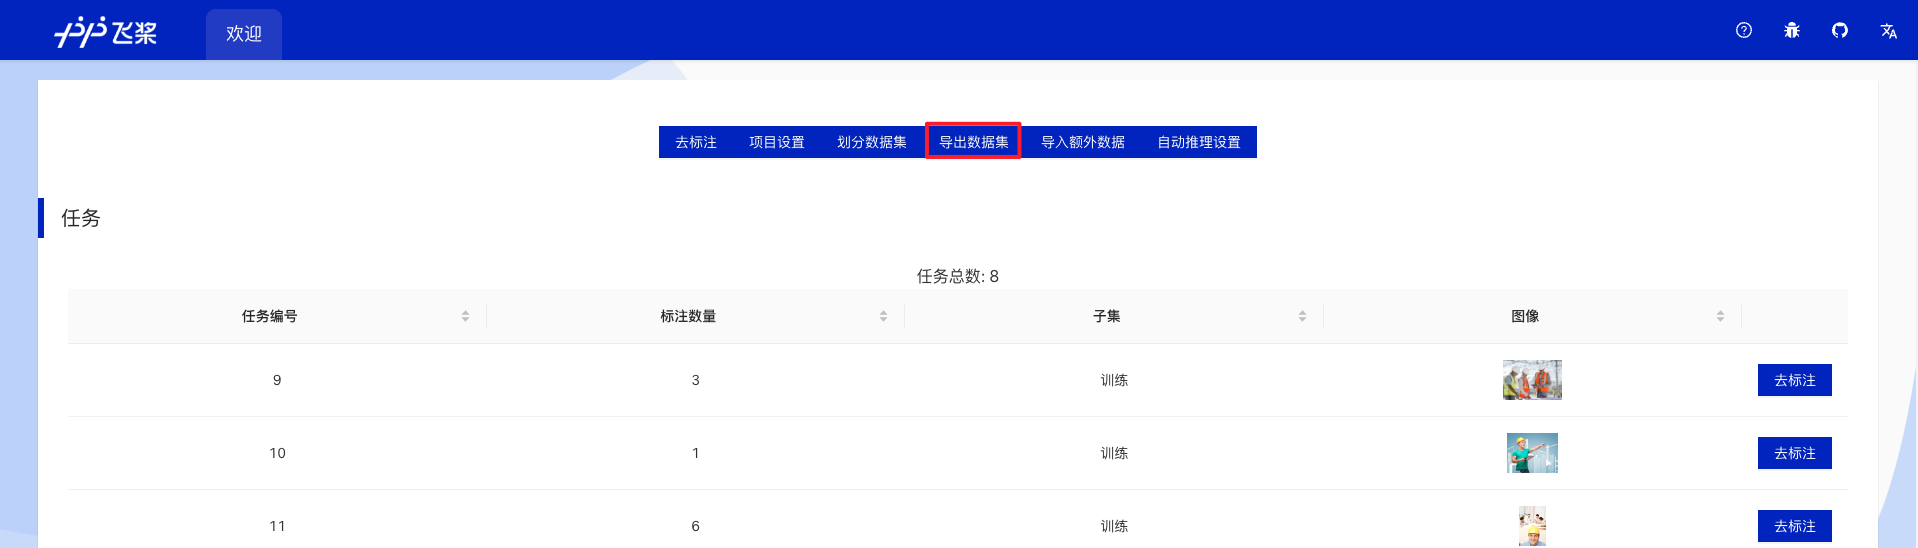
* Once done, click **Project Overview**.
* Export Annotated Files
* In the Project Overview, segment the dataset as needed and click "Export Dataset".
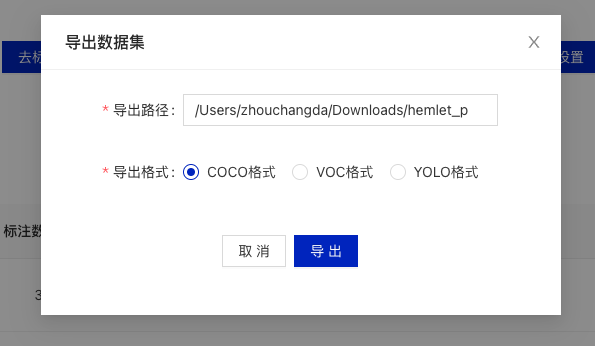
* Fill in the export path and format. The export path should be an absolute path, and the format should be `coco`.
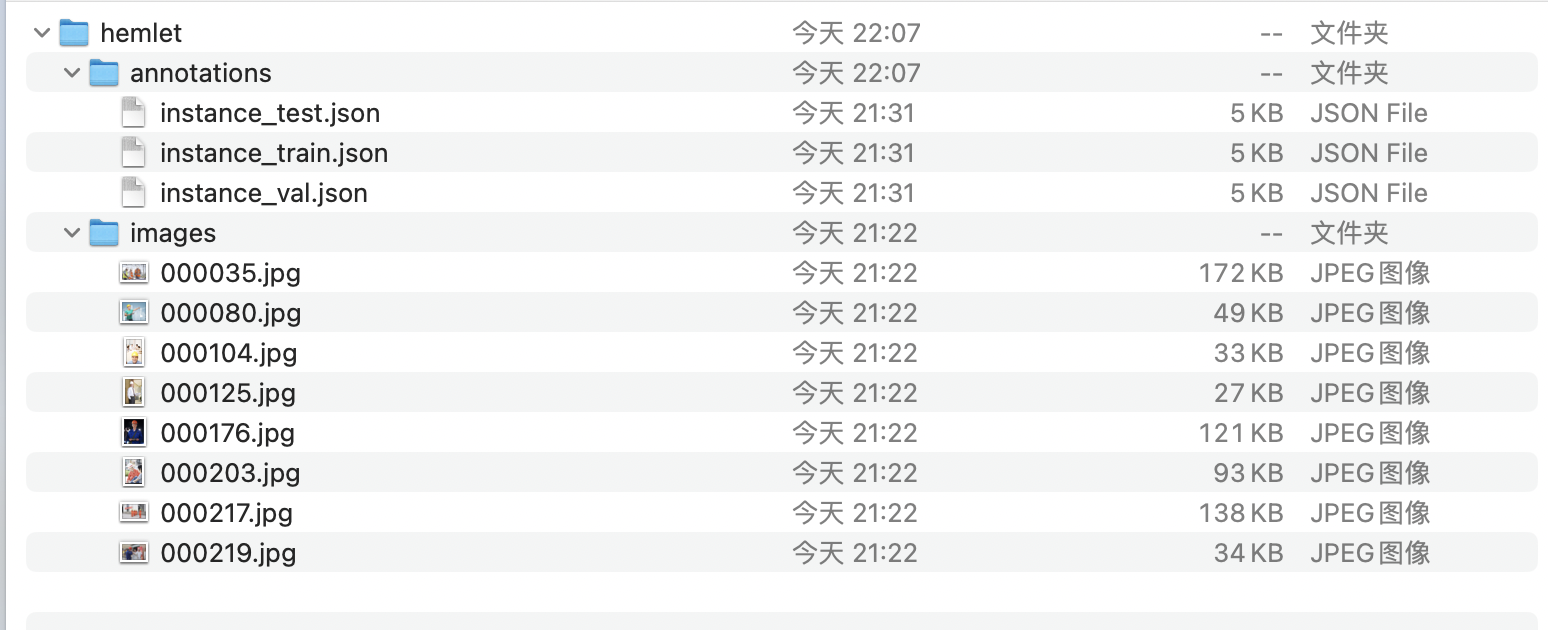
* After successful export, the annotated files will be available in the specified path.

* Adjust directories to obtain COCO-formatted dataset for helmet detection
* Rename the three `json` files and the `image` directory as follows:
| Original File/Directory Name | Renamed File/Directory Name |
|-|-|
|`train.json`|`instance_train.json`|
|`val.json`|`instance_val.json`|
|`test.json`|`instance_test.json`|
|`image`|`images`|
* Create an `annotations` directory in the root of the dataset and move all `json` files into it. The final dataset structure should look like this:
* Compress the `helmet` directory into a `.tar` or `.zip` file to obtain the COCO-formatted dataset for helmet detection.
## 4. Image Multi-Label Classification Data Format Conversion
After obtaining data in COCO format, you need to convert the data format to `MLClsDataset` format. Below is a code example that follows the previous tutorial to use `LabelMe` or `PaddleLabel` annotated data and perform data format conversion:
```bash
# Download and unzip the COCO example dataset
cd /path/to/paddlex
wget https://paddle-model-ecology.bj.bcebos.com/paddlex/data/det_coco_examples.tar -P ./dataset
tar -xf ./dataset/det_coco_examples.tar -C ./dataset/
# Convert the COCO example dataset to MLClsDataset
python main.py -c paddlex/configs/multilabel_classification/PP-LCNet_x1_0_ML.yaml \
-o Global.mode=check_dataset \
-o Global.dataset_dir=./dataset/det_coco_examples \
-o CheckDataset.convert.enable=True \
-o CheckDataset.convert.src_dataset_type=COCO
```
## 5. Data Format
The dataset defined by PaddleX for image multi-label classification tasks is named **MLClsDataset**, with the following directory structure and annotation format:
```bash
dataset_dir # Root directory of the dataset, the directory name can be changed
├── images # Directory where images are saved, the directory name can be changed, but note the correspondence with the content of train.txt and val.txt
├── label.txt # Correspondence between annotation IDs and category names, the file name cannot be changed. Each line gives the category ID and category name, for example: 45 wallflower
├── train.txt # Annotation file for the training set, the file name cannot be changed. Each line gives the image path and multi-label classification tags for the image, separated by spaces, for example: images/0041_2456602544.jpg 0,0,0,0,0,0,1,0,0,0,0,0,0,0,0,0,0,0,0,0,0,0,0,1,0,0,0,0,0,0,0,0,0
└── val.txt # Annotation file for the validation set, the file name cannot be changed. Each line gives the image path and multi-label classification tags for the image, separated by spaces, for example: images/0045_845243484.jpg 0,0,0,0,0,0,1,0,0,0,0,0,0,0,0,0,0,0,0,0,0,0,0,1,0,0,0,0,0,0,0,0,0
```
The annotation files use the multi-label classification format. Please prepare your data according to the above specifications. Additionally, you can refer to the [example dataset](https://paddle-model-ecology.bj.bcebos.com/paddlex/data/mlcls_nus_examples.tar).