简体中文 | [English](object_detection_en.md)
# 通用目标检测产线使用教程
## 1. 通用目标检测产线介绍
目标检测旨在识别图像或视频中多个对象的类别及其位置,通过生成边界框来标记这些对象。与简单的图像分类不同,目标检测不仅需要识别出图像中有哪些物体,例如人、车和动物等,还需要准确地确定每个物体在图像中的具体位置,通常以矩形框的形式表示。该技术广泛应用于自动驾驶、监控系统和智能相册等领域,依赖于深度学习模型(如YOLO、Faster R-CNN等),这些模型能够高效地提取特征并进行实时检测,显著提升了计算机对图像内容理解的能力。
**通用****目标检测****产线中包含了****目标检测****模块,如您更考虑模型精度,请选择精度较高的模型,如您更考虑模型推理速度,请选择推理速度较快的模型,如您更考虑模型存储大小,请选择存储大小较小的模型**。
👉模型列表详情
|模型名称|mAP(%)|GPU推理耗时(ms)|CPU推理耗时|模型存储大小(M)|
|-|-|-|-|-|
|Cascade-FasterRCNN-ResNet50-FPN|41.1|-|-|245.4 M|
|Cascade-FasterRCNN-ResNet50-vd-SSLDv2-FPN|45.0|-|-|246.2 M|
|CenterNet-DLA-34|37.6|-|-|75.4 M|
|CenterNet-ResNet50|38.9|-|-|319.7 M|
|DETR-R50|42.3|59.2132|5334.52|159.3 M|
|FasterRCNN-ResNet34-FPN|37.8|-|-|137.5 M|
|FasterRCNN-ResNet50-FPN|38.4|-|-|148.1 M|
|FasterRCNN-ResNet50-vd-FPN|39.5|-|-|148.1 M|
|FasterRCNN-ResNet50-vd-SSLDv2-FPN|41.4|-|-|148.1 M|
|FasterRCNN-ResNet50|36.7|-|-|120.2 M|
|FasterRCNN-ResNet101-FPN|41.4|-|-|216.3 M|
|FasterRCNN-ResNet101|39.0|-|-|188.1 M|
|FasterRCNN-ResNeXt101-vd-FPN|43.4|-|-|360.6 M|
|FasterRCNN-Swin-Tiny-FPN|42.6|-|-|159.8 M|
|FCOS-ResNet50|39.6|103.367|3424.91|124.2 M|
|PicoDet-L|42.6|16.6715|169.904|20.9 M|
|PicoDet-M|37.5|16.2311|71.7257|16.8 M|
|PicoDet-S|29.1|14.097|37.6563|4.4 M |
|PicoDet-XS|26.2|13.8102|48.3139|5.7M |
|PP-YOLOE_plus-L|52.9|33.5644|814.825|185.3 M|
|PP-YOLOE_plus-M|49.8|19.843|449.261|83.2 M|
|PP-YOLOE_plus-S|43.7|16.8884|223.059|28.3 M|
|PP-YOLOE_plus-X|54.7|57.8995|1439.93|349.4 M|
|RT-DETR-H|56.3|114.814|3933.39|435.8 M|
|RT-DETR-L|53.0|34.5252|1454.27|113.7 M|
|RT-DETR-R18|46.5|19.89|784.824|70.7 M|
|RT-DETR-R50|53.1|41.9327|1625.95|149.1 M|
|RT-DETR-X|54.8|61.8042|2246.64|232.9 M|
|YOLOv3-DarkNet53|39.1|40.1055|883.041|219.7 M|
|YOLOv3-MobileNetV3|31.4|18.6692|267.214|83.8 M|
|YOLOv3-ResNet50_vd_DCN|40.6|31.6276|856.047|163.0 M|
|YOLOX-L|50.1|185.691|1250.58|192.5 M|
|YOLOX-M|46.9|123.324|688.071|90.0 M|
|YOLOX-N|26.1|79.1665|155.59|3.4M|
|YOLOX-S|40.4|184.828|474.446|32.0 M|
|YOLOX-T|32.9|102.748|212.52|18.1 M|
|YOLOX-X|51.8|227.361|2067.84|351.5 M|
**注:以上精度指标为[COCO2017](https://cocodataset.org/#home)验证集 mAP(0.5:0.95)。所有模型 GPU 推理耗时基于 NVIDIA Tesla T4 机器,精度类型为 FP32, CPU 推理速度基于 Intel(R) Xeon(R) Gold 5117 CPU @ 2.00GHz,线程数为8,精度类型为 FP32。**
## 2. 快速开始
PaddleX 所提供的预训练的模型产线均可以快速体验效果,你可以在线体验通用目标检测产线的效果,也可以在本地使用命令行或 Python 体验通用目标检测产线的效果。
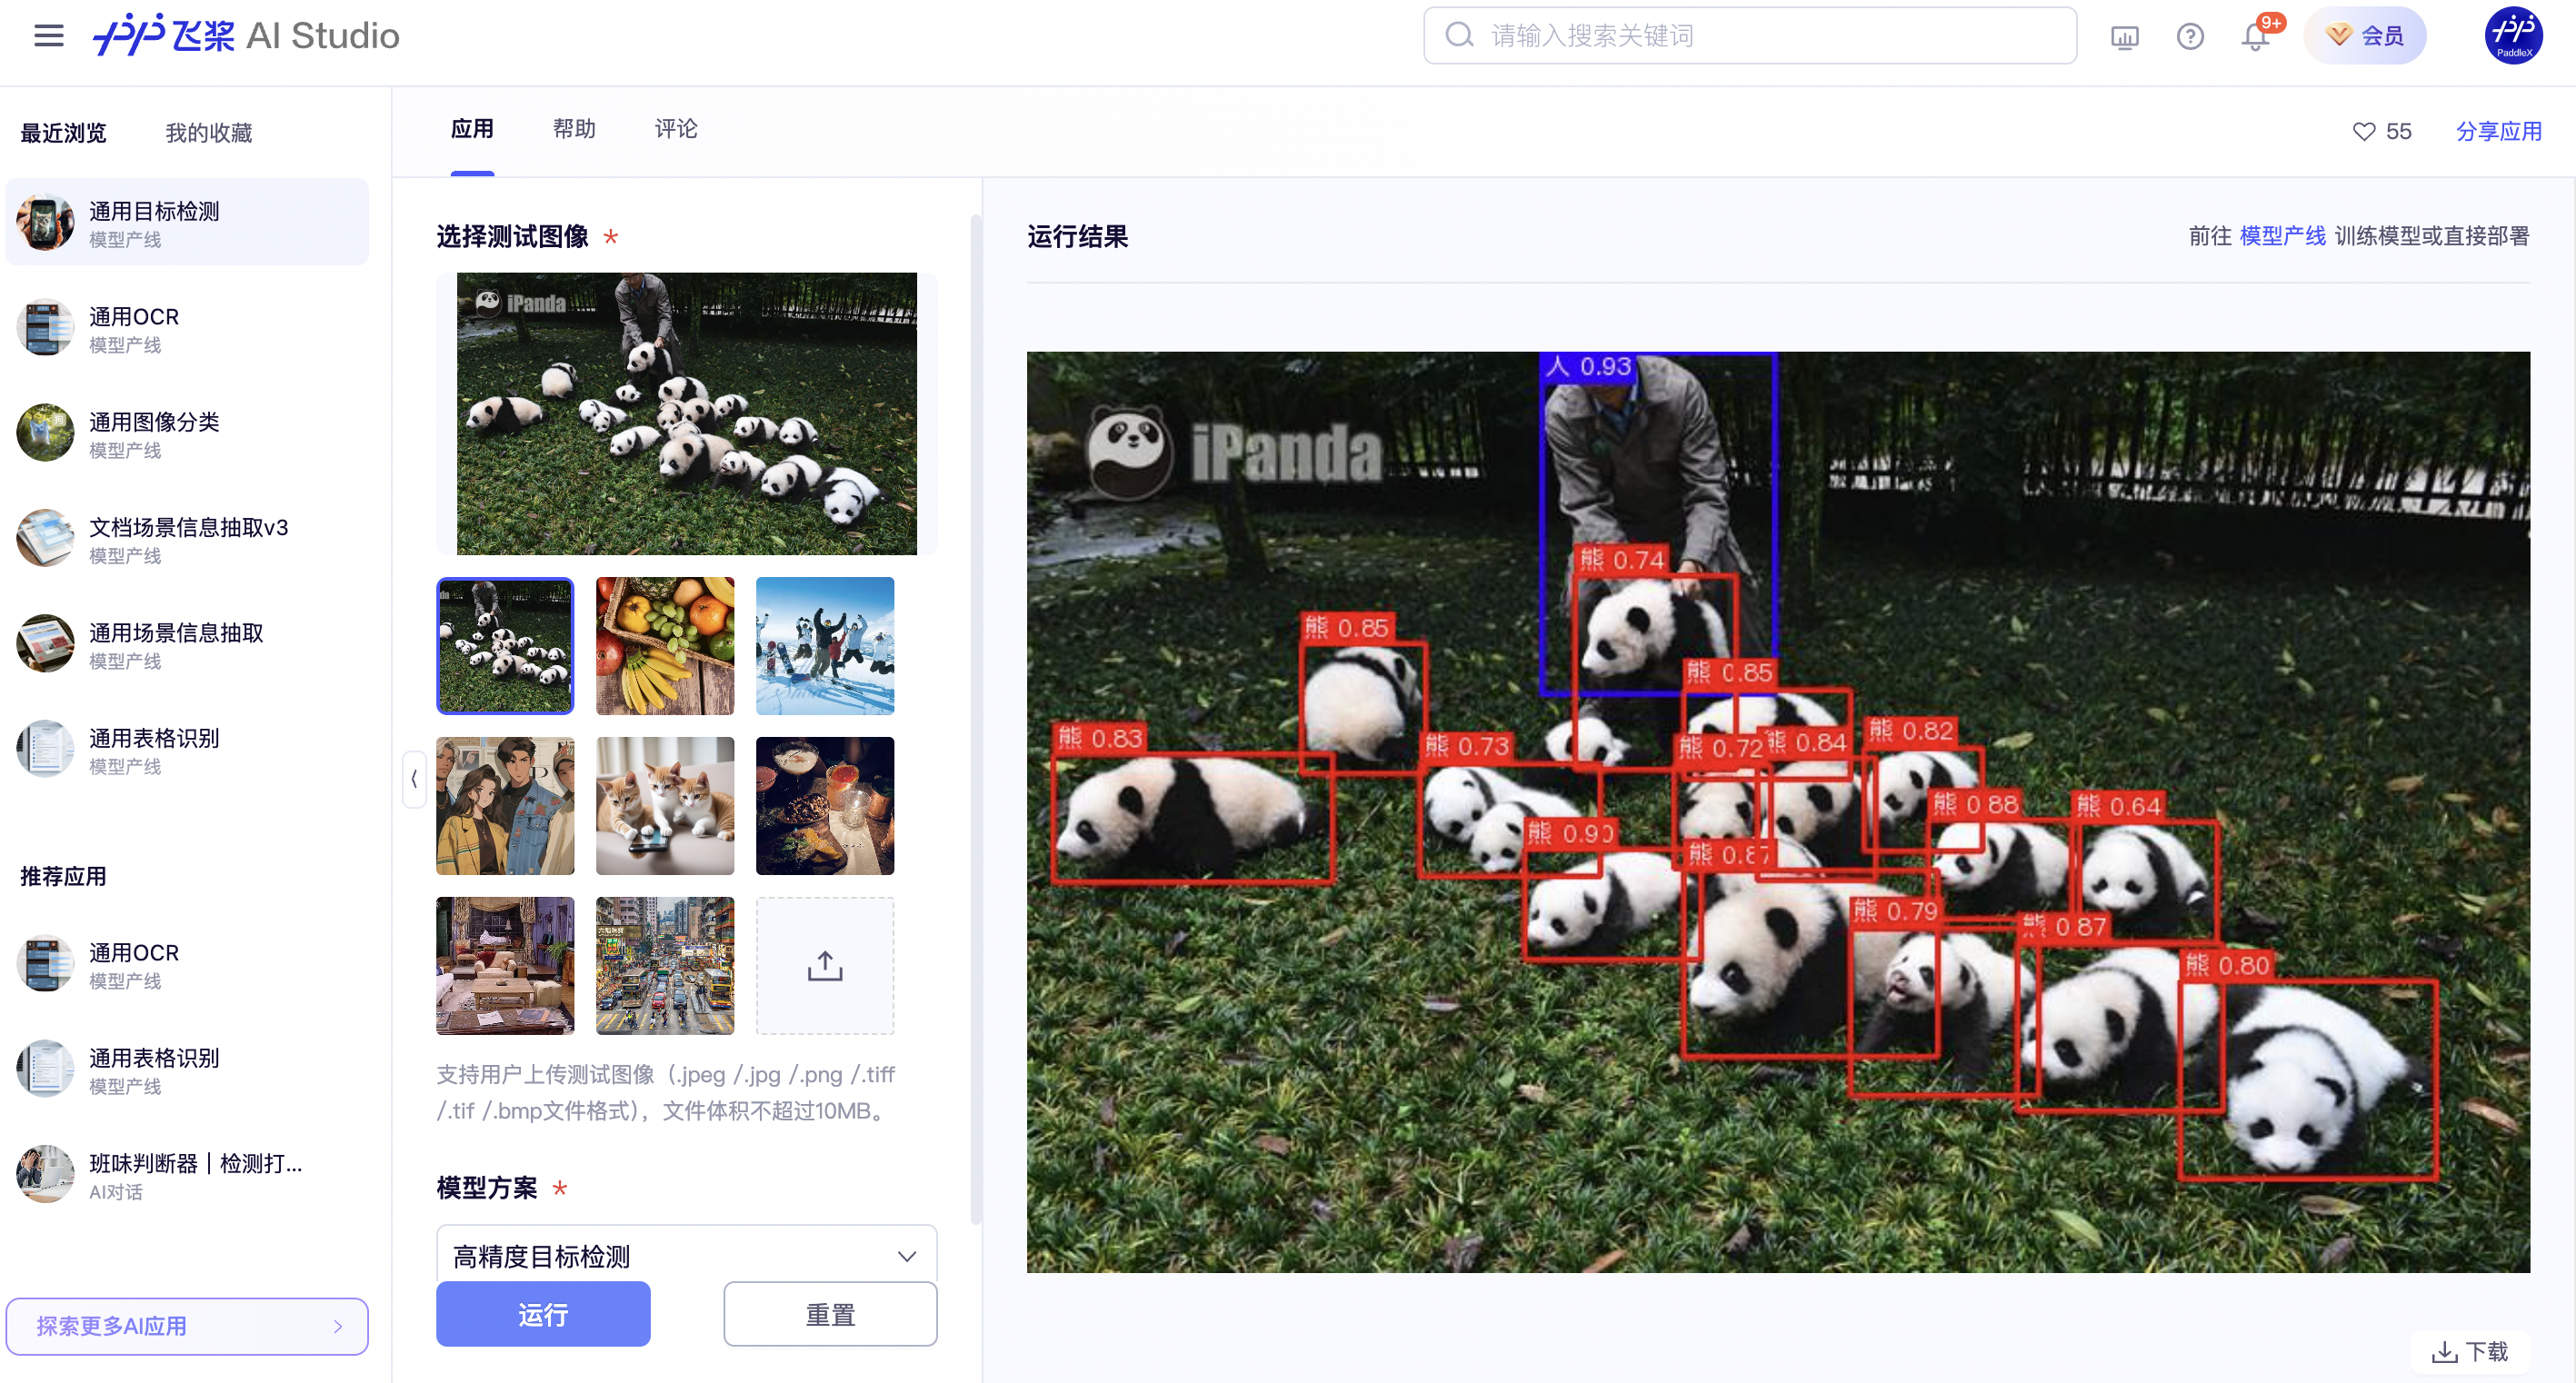
### 2.1 在线体验
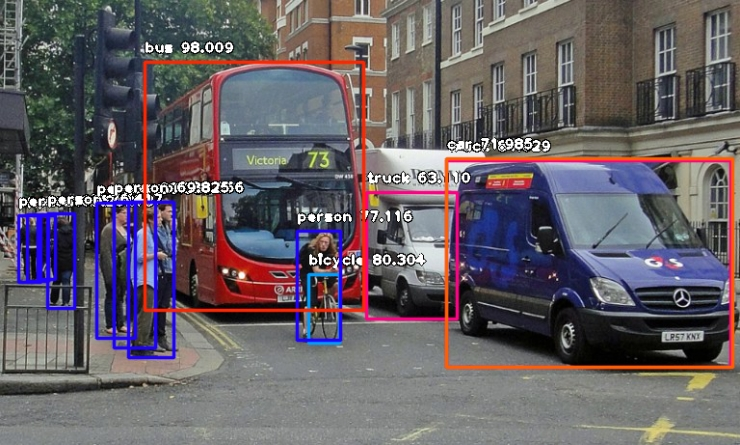
您可以[在线体验](https://aistudio.baidu.com/community/app/70230/webUI)通用目标检测产线的效果,用官方提供的 demo 图片进行识别,例如:
如果您对产线运行的效果满意,可以直接对产线进行集成部署,如果不满意,您也可以利用私有数据**对产线中的模型进行在线微调**。
### 2.2 本地体验
在本地使用通用目标检测产线前,请确保您已经按照[PaddleX本地安装教程](../../../installation/installation.md)完成了PaddleX的wheel包安装。
#### 2.2.1 命令行方式体验
一行命令即可快速体验目标检测产线效果,使用 [测试文件](https://paddle-model-ecology.bj.bcebos.com/paddlex/imgs/demo_image/general_object_detection_002.png),并将 `--input` 替换为本地路径,进行预测
```
paddlex --pipeline object_detection --input general_object_detection_002.png --device gpu:0
```
参数说明:
```
--pipeline:产线名称,此处为目标检测产线
--input:待处理的输入图片的本地路径或URL
--device 使用的GPU序号(例如gpu:0表示使用第0块GPU,gpu:1,2表示使用第1、2块GPU),也可选择使用CPU(--device cpu)
```
在执行上述 Python 脚本时,加载的是默认的目标检测产线配置文件,若您需要自定义配置文件,可执行如下命令获取:
👉点击展开
```
paddlex --get_pipeline_config object_detection
```
执行后,目标检测产线配置文件将被保存在当前路径。若您希望自定义保存位置,可执行如下命令(假设自定义保存位置为 `./my_path` ):
```
paddlex --get_pipeline_config object_detection --config_save_path ./my_path
```
获取产线配置文件后,可将 `--pipeline` 替换为配置文件保存路径,即可使配置文件生效。例如,若配置文件保存路径为 `./object_detection.yaml`,只需执行:
```
paddlex --pipeline ./object_detection.yaml --input general_object_detection_002.png
```
其中,`--model`、`--device` 等参数无需指定,将使用配置文件中的参数。若依然指定了参数,将以指定的参数为准。
运行后,得到的结果为:
```
{'img_path': '/root/.paddlex/predict_input/general_object_detection_002.png', 'boxes': [{'cls_id': 49, 'label': 'orange', 'score': 0.8188097476959229, 'coordinate': [661, 93, 870, 305]}, {'cls_id': 47, 'label': 'apple', 'score': 0.7743489146232605, 'coordinate': [76, 274, 330, 520]}, {'cls_id': 47, 'label': 'apple', 'score': 0.7270504236221313, 'coordinate': [285, 94, 469, 297]}, {'cls_id': 46, 'label': 'banana', 'score': 0.5570532083511353, 'coordinate': [310, 361, 685, 712]}, {'cls_id': 47, 'label': 'apple', 'score': 0.5484835505485535, 'coordinate': [764, 285, 924, 440]}, {'cls_id': 47, 'label': 'apple', 'score': 0.5160726308822632, 'coordinate': [853, 169, 987, 303]}, {'cls_id': 60, 'label': 'dining table', 'score': 0.5142655968666077, 'coordinate': [0, 0, 1072, 720]}, {'cls_id': 47, 'label': 'apple', 'score': 0.5101479291915894, 'coordinate': [57, 23, 213, 176]}]}
```

可视化图片默认保存在 `output` 目录下,您也可以通过 `--save_path` 进行自定义。
#### 2.2.2 Python脚本方式集成
几行代码即可完成产线的快速推理,以通用目标检测产线为例:
```python
from paddlex import create_pipeline
pipeline = create_pipeline(pipeline="object_detection")
output = pipeline.predict("general_object_detection_002.png")
for res in output:
res.print() ## 打印预测的结构化输出
res.save_to_img("./output/") ## 保存结果可视化图像
res.save_to_json("./output/") ## 保存预测的结构化输出
```
得到的结果与命令行方式相同。
在上述 Python 脚本中,执行了如下几个步骤:
(1)实例化 `create_pipeline` 实例化产线对象:具体参数说明如下:
|参数|参数说明|参数类型|默认值|
|-|-|-|-|
|`pipeline`|产线名称或是产线配置文件路径。如为产线名称,则必须为 PaddleX 所支持的产线。|`str`|无|
|`device`|产线模型推理设备。支持:“gpu”,“cpu”。|`str`|`gpu`|
|`enable_hpi`|是否启用高性能推理,仅当该产线支持高性能推理时可用。|`bool`|`False`|
(2)调用产线对象的 `predict` 方法进行推理预测:`predict` 方法参数为`x`,用于输入待预测数据,支持多种输入方式,具体示例如下:
| 参数类型 | 参数说明 |
|---------------|-----------------------------------------------------------------------------------------------------------|
| Python Var | 支持直接传入Python变量,如numpy.ndarray表示的图像数据。 |
| str | 支持传入待预测数据文件路径,如图像文件的本地路径:`/root/data/img.jpg`。 |
| str | 支持传入待预测数据文件URL,如图像文件的网络URL:[示例](https://paddle-model-ecology.bj.bcebos.com/paddlex/imgs/demo_image/general_object_detection_002.png)。|
| str | 支持传入本地目录,该目录下需包含待预测数据文件,如本地路径:`/root/data/`。 |
| dict | 支持传入字典类型,字典的key需与具体任务对应,如图像分类任务对应\"img\",字典的val支持上述类型数据,例如:`{\"img\": \"/root/data1\"}`。|
| list | 支持传入列表,列表元素需为上述类型数据,如`[numpy.ndarray, numpy.ndarray],[\"/root/data/img1.jpg\", \"/root/data/img2.jpg\"]`,`[\"/root/data1\", \"/root/data2\"]`,`[{\"img\": \"/root/data1\"}, {\"img\": \"/root/data2/img.jpg\"}]`。|
(3)调用`predict`方法获取预测结果:`predict` 方法为`generator`,因此需要通过调用获得预测结果,`predict`方法以batch为单位对数据进行预测,因此预测结果为list形式表示的一组预测结果。
(4)对预测结果进行处理:每个样本的预测结果均为`dict`类型,且支持打印,或保存为文件,支持保存的类型与具体产线相关,如:
| 方法 | 说明 | 方法参数 |
|--------------|-----------------------------|--------------------------------------------------------------------------------------------------------|
| print | 打印结果到终端 | `- format_json`:bool类型,是否对输出内容进行使用json缩进格式化,默认为True;
`- indent`:int类型,json格式化设置,仅当format_json为True时有效,默认为4;
`- ensure_ascii`:bool类型,json格式化设置,仅当format_json为True时有效,默认为False; |
| save_to_json | 将结果保存为json格式的文件 | `- save_path`:str类型,保存的文件路径,当为目录时,保存文件命名与输入文件类型命名一致;
`- indent`:int类型,json格式化设置,默认为4;
`- ensure_ascii`:bool类型,json格式化设置,默认为False; |
| save_to_img | 将结果保存为图像格式的文件 | `- save_path`:str类型,保存的文件路径,当为目录时,保存文件命名与输入文件类型命名一致; |
若您获取了配置文件,即可对目标检测产线各项配置进行自定义,只需要修改 `create_pipeline` 方法中的 `pipeline` 参数值为产线配置文件路径即可。
例如,若您的配置文件保存在 `./my_path/object_detection.yaml` ,则只需执行:
```python
from paddlex import create_pipeline
pipeline = create_pipeline(pipeline="./my_path/object_detection.yaml")
output = pipeline.predict("general_object_detection_002.png")
for res in output:
res.print() ## 打印预测的结构化输出
res.save_to_img("./output/") ## 保存结果可视化图像
res.save_to_json("./output/") ## 保存预测的结构化输出
```
## 3. 开发集成/部署
如果产线可以达到您对产线推理速度和精度的要求,您可以直接进行开发集成/部署。
若您需要将产线直接应用在您的Python项目中,可以参考 [2.2.2 Python脚本方式](#222-python脚本方式集成)中的示例代码。
此外,PaddleX 也提供了其他三种部署方式,详细说明如下:
🚀 **高性能部署**:在实际生产环境中,许多应用对部署策略的性能指标(尤其是响应速度)有着较严苛的标准,以确保系统的高效运行与用户体验的流畅性。为此,PaddleX 提供高性能推理插件,旨在对模型推理及前后处理进行深度性能优化,实现端到端流程的显著提速,详细的高性能部署流程请参考[PaddleX高性能部署指南](../../../pipeline_deploy/high_performance_deploy.md)。
☁️ **服务化部署**:服务化部署是实际生产环境中常见的一种部署形式。通过将推理功能封装为服务,客户端可以通过网络请求来访问这些服务,以获取推理结果。PaddleX 支持用户以低成本实现产线的服务化部署,详细的服务化部署流程请参考[PaddleX服务化部署指南](../../../pipeline_deploy/service_deploy.md)。
下面是API参考和多语言服务调用示例:
API参考
对于服务提供的所有操作:
- 响应体以及POST请求的请求体均为JSON数据(JSON对象)。
- 当请求处理成功时,响应状态码为`200`,响应体的属性如下:
|名称|类型|含义|
|-|-|-|
|`errorCode`|`integer`|错误码。固定为`0`。|
|`errorMsg`|`string`|错误说明。固定为`"Success"`。|
响应体还可能有`result`属性,类型为`object`,其中存储操作结果信息。
- 当请求处理未成功时,响应体的属性如下:
|名称|类型|含义|
|-|-|-|
|`errorCode`|`integer`|错误码。与响应状态码相同。|
|`errorMsg`|`string`|错误说明。|
服务提供的操作如下:
- **`infer`**
对图像进行目标检测。
`POST /object-detection`
- 请求体的属性如下:
|名称|类型|含义|是否必填|
|-|-|-|-|
|`image`|`string`|服务可访问的图像文件的URL或图像文件内容的Base64编码结果。|是|
- 请求处理成功时,响应体的`result`具有如下属性:
|名称|类型|含义|
|-|-|-|
|`detectedObjects`|`array`|目标的位置、类别等信息。|
|`image`|`string`|目标检测结果图。图像为JPEG格式,使用Base64编码。|
`detectedObjects`中的每个元素为一个`object`,具有如下属性:
|名称|类型|含义|
|-|-|-|
|`bbox`|`array`|目标位置。数组中元素依次为边界框左上角x坐标、左上角y坐标、右下角x坐标以及右下角y坐标。|
|`categoryId`|`integer`|目标类别ID。|
|`score`|`number`|目标得分。|
`result`示例如下:
```json
{
"detectedObjects": [
{
"bbox": [
404.4967956542969,
90.15770721435547,
506.2465515136719,
285.4187316894531
],
"categoryId": 0,
"score": 0.7418514490127563
},
{
"bbox": [
155.33145141601562,
81.10954284667969,
199.71136474609375,
167.4235382080078
],
"categoryId": 1,
"score": 0.7328268885612488
}
],
"image": "xxxxxx"
}
```
多语言调用服务示例
Python
```python
import base64
import requests
API_URL = "http://localhost:8080/object-detection" # 服务URL
image_path = "./demo.jpg"
output_image_path = "./out.jpg"
# 对本地图像进行Base64编码
with open(image_path, "rb") as file:
image_bytes = file.read()
image_data = base64.b64encode(image_bytes).decode("ascii")
payload = {"image": image_data} # Base64编码的文件内容或者图像URL
# 调用API
response = requests.post(API_URL, json=payload)
# 处理接口返回数据
assert response.status_code == 200
result = response.json()["result"]
with open(output_image_path, "wb") as file:
file.write(base64.b64decode(result["image"]))
print(f"Output image saved at {output_image_path}")
print("\nDetectedobjects:")
print(result["detectedObjects"])
```
C++
```cpp
#include
#include "cpp-httplib/httplib.h" // https://github.com/Huiyicc/cpp-httplib
#include "nlohmann/json.hpp" // https://github.com/nlohmann/json
#include "base64.hpp" // https://github.com/tobiaslocker/base64
int main() {
httplib::Client client("localhost:8080");
const std::string imagePath = "./demo.jpg";
const std::string outputImagePath = "./out.jpg";
httplib::Headers headers = {
{"Content-Type", "application/json"}
};
// 对本地图像进行Base64编码
std::ifstream file(imagePath, std::ios::binary | std::ios::ate);
std::streamsize size = file.tellg();
file.seekg(0, std::ios::beg);
std::vector buffer(size);
if (!file.read(buffer.data(), size)) {
std::cerr << "Error reading file." << std::endl;
return 1;
}
std::string bufferStr(reinterpret_cast(buffer.data()), buffer.size());
std::string encodedImage = base64::to_base64(bufferStr);
nlohmann::json jsonObj;
jsonObj["image"] = encodedImage;
std::string body = jsonObj.dump();
// 调用API
auto response = client.Post("/object-detection", headers, body, "application/json");
// 处理接口返回数据
if (response && response->status == 200) {
nlohmann::json jsonResponse = nlohmann::json::parse(response->body);
auto result = jsonResponse["result"];
encodedImage = result["image"];
std::string decodedString = base64::from_base64(encodedImage);
std::vector decodedImage(decodedString.begin(), decodedString.end());
std::ofstream outputImage(outPutImagePath, std::ios::binary | std::ios::out);
if (outputImage.is_open()) {
outputImage.write(reinterpret_cast(decodedImage.data()), decodedImage.size());
outputImage.close();
std::cout << "Output image saved at " << outPutImagePath << std::endl;
} else {
std::cerr << "Unable to open file for writing: " << outPutImagePath << std::endl;
}
auto detectedObjects = result["detectedObjects"];
std::cout << "\nDetectedobjects:" << std::endl;
for (const auto& category : detectedObjects) {
std::cout << category << std::endl;
}
} else {
std::cout << "Failed to send HTTP request." << std::endl;
return 1;
}
return 0;
}
```
Java
```java
import okhttp3.*;
import com.fasterxml.jackson.databind.ObjectMapper;
import com.fasterxml.jackson.databind.JsonNode;
import com.fasterxml.jackson.databind.node.ObjectNode;
import java.io.File;
import java.io.FileOutputStream;
import java.io.IOException;
import java.util.Base64;
public class Main {
public static void main(String[] args) throws IOException {
String API_URL = "http://localhost:8080/object-detection"; // 服务URL
String imagePath = "./demo.jpg"; // 本地图像
String outputImagePath = "./out.jpg"; // 输出图像
// 对本地图像进行Base64编码
File file = new File(imagePath);
byte[] fileContent = java.nio.file.Files.readAllBytes(file.toPath());
String imageData = Base64.getEncoder().encodeToString(fileContent);
ObjectMapper objectMapper = new ObjectMapper();
ObjectNode params = objectMapper.createObjectNode();
params.put("image", imageData); // Base64编码的文件内容或者图像URL
// 创建 OkHttpClient 实例
OkHttpClient client = new OkHttpClient();
MediaType JSON = MediaType.Companion.get("application/json; charset=utf-8");
RequestBody body = RequestBody.Companion.create(params.toString(), JSON);
Request request = new Request.Builder()
.url(API_URL)
.post(body)
.build();
// 调用API并处理接口返回数据
try (Response response = client.newCall(request).execute()) {
if (response.isSuccessful()) {
String responseBody = response.body().string();
JsonNode resultNode = objectMapper.readTree(responseBody);
JsonNode result = resultNode.get("result");
String base64Image = result.get("image").asText();
JsonNode detectedObjects = result.get("detectedObjects");
byte[] imageBytes = Base64.getDecoder().decode(base64Image);
try (FileOutputStream fos = new FileOutputStream(outputImagePath)) {
fos.write(imageBytes);
}
System.out.println("Output image saved at " + outputImagePath);
System.out.println("\nDetectedobjects: " + detectedObjects.toString());
} else {
System.err.println("Request failed with code: " + response.code());
}
}
}
}
```
Go
```go
package main
import (
"bytes"
"encoding/base64"
"encoding/json"
"fmt"
"io/ioutil"
"net/http"
)
func main() {
API_URL := "http://localhost:8080/object-detection"
imagePath := "./demo.jpg"
outputImagePath := "./out.jpg"
// 对本地图像进行Base64编码
imageBytes, err := ioutil.ReadFile(imagePath)
if err != nil {
fmt.Println("Error reading image file:", err)
return
}
imageData := base64.StdEncoding.EncodeToString(imageBytes)
payload := map[string]string{"image": imageData} // Base64编码的文件内容或者图像URL
payloadBytes, err := json.Marshal(payload)
if err != nil {
fmt.Println("Error marshaling payload:", err)
return
}
// 调用API
client := &http.Client{}
req, err := http.NewRequest("POST", API_URL, bytes.NewBuffer(payloadBytes))
if err != nil {
fmt.Println("Error creating request:", err)
return
}
res, err := client.Do(req)
if err != nil {
fmt.Println("Error sending request:", err)
return
}
defer res.Body.Close()
// 处理接口返回数据
body, err := ioutil.ReadAll(res.Body)
if err != nil {
fmt.Println("Error reading response body:", err)
return
}
type Response struct {
Result struct {
Image string `json:"image"`
Detectedobjects []map[string]interface{} `json:"detectedObjects"`
} `json:"result"`
}
var respData Response
err = json.Unmarshal([]byte(string(body)), &respData)
if err != nil {
fmt.Println("Error unmarshaling response body:", err)
return
}
outputImageData, err := base64.StdEncoding.DecodeString(respData.Result.Image)
if err != nil {
fmt.Println("Error decoding base64 image data:", err)
return
}
err = ioutil.WriteFile(outputImagePath, outputImageData, 0644)
if err != nil {
fmt.Println("Error writing image to file:", err)
return
}
fmt.Printf("Image saved at %s.jpg\n", outputImagePath)
fmt.Println("\nDetectedobjects:")
for _, category := range respData.Result.Detectedobjects {
fmt.Println(category)
}
}
```
C#
```csharp
using System;
using System.IO;
using System.Net.Http;
using System.Net.Http.Headers;
using System.Text;
using System.Threading.Tasks;
using Newtonsoft.Json.Linq;
class Program
{
static readonly string API_URL = "http://localhost:8080/object-detection";
static readonly string imagePath = "./demo.jpg";
static readonly string outputImagePath = "./out.jpg";
static async Task Main(string[] args)
{
var httpClient = new HttpClient();
// 对本地图像进行Base64编码
byte[] imageBytes = File.ReadAllBytes(imagePath);
string image_data = Convert.ToBase64String(imageBytes);
var payload = new JObject{ { "image", image_data } }; // Base64编码的文件内容或者图像URL
var content = new StringContent(payload.ToString(), Encoding.UTF8, "application/json");
// 调用API
HttpResponseMessage response = await httpClient.PostAsync(API_URL, content);
response.EnsureSuccessStatusCode();
// 处理接口返回数据
string responseBody = await response.Content.ReadAsStringAsync();
JObject jsonResponse = JObject.Parse(responseBody);
string base64Image = jsonResponse["result"]["image"].ToString();
byte[] outputImageBytes = Convert.FromBase64String(base64Image);
File.WriteAllBytes(outputImagePath, outputImageBytes);
Console.WriteLine($"Output image saved at {outputImagePath}");
Console.WriteLine("\nDetectedobjects:");
Console.WriteLine(jsonResponse["result"]["detectedObjects"].ToString());
}
}
```
Node.js
```js
const axios = require('axios');
const fs = require('fs');
const API_URL = 'http://localhost:8080/object-detection'
const imagePath = './demo.jpg'
const outputImagePath = "./out.jpg";
let config = {
method: 'POST',
maxBodyLength: Infinity,
url: API_URL,
data: JSON.stringify({
'image': encodeImageToBase64(imagePath) // Base64编码的文件内容或者图像URL
})
};
// 对本地图像进行Base64编码
function encodeImageToBase64(filePath) {
const bitmap = fs.readFileSync(filePath);
return Buffer.from(bitmap).toString('base64');
}
// 调用API
axios.request(config)
.then((response) => {
// 处理接口返回数据
const result = response.data["result"];
const imageBuffer = Buffer.from(result["image"], 'base64');
fs.writeFile(outputImagePath, imageBuffer, (err) => {
if (err) throw err;
console.log(`Output image saved at ${outputImagePath}`);
});
console.log("\nDetectedobjects:");
console.log(result["detectedObjects"]);
})
.catch((error) => {
console.log(error);
});
```
PHP
```php
$image_data); // Base64编码的文件内容或者图像URL
// 调用API
$ch = curl_init($API_URL);
curl_setopt($ch, CURLOPT_POST, true);
curl_setopt($ch, CURLOPT_POSTFIELDS, json_encode($payload));
curl_setopt($ch, CURLOPT_RETURNTRANSFER, true);
$response = curl_exec($ch);
curl_close($ch);
// 处理接口返回数据
$result = json_decode($response, true)["result"];
file_put_contents($output_image_path, base64_decode($result["image"]));
echo "Output image saved at " . $output_image_path . "\n";
echo "\nDetectedobjects:\n";
print_r($result["detectedObjects"]);
?>
```
📱 **端侧部署**:端侧部署是一种将计算和数据处理功能放在用户设备本身上的方式,设备可以直接处理数据,而不需要依赖远程的服务器。PaddleX 支持将模型部署在 Android 等端侧设备上,详细的端侧部署流程请参考[PaddleX端侧部署指南](../../../pipeline_deploy/lite_deploy.md)。
您可以根据需要选择合适的方式部署模型产线,进而进行后续的 AI 应用集成。
## 4. 二次开发
如果通用目标检测产线提供的默认模型权重在您的场景中,精度或速度不满意,您可以尝试利用**您自己拥有的特定领域或应用场景的数据**对现有模型进行进一步的**微调**,以提升通用目标检测产线的在您的场景中的识别效果。
### 4.1 模型微调
由于通用目标检测产线包含目标检测模块,如果模型产线的效果不及预期,那么您需要参考[目标检测模块开发教程](../../../module_usage/tutorials/cv_modules/object_detection.md)中的[二次开发](../../../module_usage/tutorials/cv_modules/object_detection.md#四二次开发)章节,使用您的私有数据集对目标检测模型进行微调。
### 4.2 模型应用
当您使用私有数据集完成微调训练后,可获得本地模型权重文件。
若您需要使用微调后的模型权重,只需对产线配置文件做修改,将微调后模型权重的本地路径替换至产线配置文件中的对应位置即可:
```python
......
Pipeline:
model: PicoDet-S #可修改为微调后模型的本地路径
device: "gpu"
batch_size: 1
......
```
随后, 参考本地体验中的命令行方式或 Python 脚本方式,加载修改后的产线配置文件即可。
## 5. 多硬件支持
PaddleX 支持英伟达 GPU、昆仑芯 XPU、昇腾 NPU和寒武纪 MLU 等多种主流硬件设备,**仅需修改 `--device` 参数**即可完成不同硬件之间的无缝切换。
例如,您使用英伟达 GPU 进行目标检测产线的推理,使用的 Python 命令为:
```
paddlex --pipeline object_detection --input general_object_detection_002.png --device gpu:0
```
此时,若您想将硬件切换为昇腾 NPU,仅需对 Python 命令中的 `--device` 修改为 npu 即可:
```
paddlex --pipeline object_detection --input general_object_detection_002.png --device npu:0
```
若您想在更多种类的硬件上使用通用目标检测产线,请参考[PaddleX多硬件使用指南](../../../other_devices_support/installation_other_devices.md)。