--- comments: true --- # Semantic Segmentation Module Tutorial ## I. Overview Semantic segmentation is a technique in computer vision that classifies each pixel in an image, dividing the image into distinct semantic regions, with each region corresponding to a specific category. This technique generates detailed segmentation maps, clearly revealing objects and their boundaries in the image, providing powerful support for image analysis and understanding. ## II. Supported Model List > The inference time only includes the model inference time and does not include the time for pre- or post-processing.
Model NameModel Download Link mIoU (%) GPU Inference Time (ms)
[Normal Mode / High-Performance Mode]
CPU Inference Time (ms)
[Normal Mode / High-Performance Mode]
Model Storage Size (MB)
OCRNet_HRNet-W48 Inference Model/Training Model 82.15 582.92 / 536.28 3513.72 / 2543.10 270
PP-LiteSeg-T Inference Model/Training Model 73.10 28.12 / 23.84 398.31 / 398.31 28.5
> โ— The above list features the 2 core models that the image classification module primarily supports. In total, this module supports 18 models. The complete list of models is as follows:
๐Ÿ‘‰Model List Details
Model NameModel Download Link mIoU (%) GPU Inference Time (ms)
[Normal Mode / High-Performance Mode]
CPU Inference Time (ms)
[Normal Mode / High-Performance Mode]
Model Storage Size (MB)
Deeplabv3_Plus-R50 Inference Model/Training Model 80.36 481.33 / 446.18 2952.95 / 1907.07 94.9
Deeplabv3_Plus-R101 Inference Model/Training Model 81.10 766.70 / 194.42 4441.56 / 2984.19 162.5
Deeplabv3-R50 Inference Model/Training Model 79.90 681.65 / 602.10 3786.41 / 3093.10 138.3
Deeplabv3-R101 Inference Model/Training Model 80.85 974.62 / 896.99 5222.60 / 4230.79 205.9
OCRNet_HRNet-W18 Inference Model/Training Model 80.67 271.02 / 221.38 1791.52 / 1061.62 43.1
OCRNet_HRNet-W48 Inference Model/Training Model 82.15 582.92 / 536.28 3513.72 / 2543.10 270
PP-LiteSeg-T Inference Model/Training Model 73.10 28.12 / 23.84 398.31 / 398.31 28.5
PP-LiteSeg-B Inference Model/Training Model 75.25 35.69 / 35.69 485.10 / 485.10 47.0
SegFormer-B0 (slice)Inference Model/Training Model 76.73 11.1946 268.929 13.2
SegFormer-B1 (slice)Inference Model/Training Model 78.35 17.9998 403.393 48.5
SegFormer-B2 (slice)Inference Model/Training Model 81.60 48.0371 1248.52 96.9
SegFormer-B3 (slice)Inference Model/Training Model 82.47 64.341 1666.35 167.3
SegFormer-B4 (slice)Inference Model/Training Model 82.38 82.4336 1995.42 226.7
SegFormer-B5 (slice)Inference Model/Training Model 82.58 97.3717 2420.19 229.7

The accuracy metrics of the above models are measured on the Cityscapes dataset. GPU inference time is based on an NVIDIA Tesla T4 machine with FP32 precision. CPU inference speed is based on an Intel(R) Xeon(R) Gold 5117 CPU @ 2.00GHz with 8 threads and FP32 precision.

Model NameModel Download Link mIoU (%) GPU Inference Time (ms)
[Normal Mode / High-Performance Mode]
CPU Inference Time (ms)
[Normal Mode / High-Performance Mode]
Model Storage Size (MB)
SeaFormer_base Inference Model/Training Model 40.92 23.78 / 17.41 282.05 / 38.88 30.8
SeaFormer_large Inference Model/Training Model 43.66 23.76 / 23.40 348.86 / 61.81 49.8
SeaFormer_small Inference Model/Training Model 38.73 18.83 / 13.27 272.28 / 35.17 14.3
SeaFormer_tiny Inference Model/Training Model 34.58 15.83 / 11.48 243.15 / 30.52 6.1
MaskFormer_small Inference Model/Training Model 49.70 65.21 / 65.21 - / 629.85 243
MaskFormer_tiny Inference Model/Training Model 46.69 47.95 / 47.95 - / 492.67 160
Test Environment Description:
Mode GPU Configuration CPU Configuration Acceleration Technology Combination
Normal Mode FP32 Precision / No TRT Acceleration FP32 Precision / 8 Threads PaddleInference
High-Performance Mode Optimal combination of pre-selected precision types and acceleration strategies FP32 Precision / 8 Threads Pre-selected optimal backend (Paddle/OpenVINO/TRT, etc.)
## III. Quick Integration > โ— Before quick integration, please install the PaddleX wheel package. For detailed instructions, refer to the [PaddleX Local Installation Guide](../../../installation/installation.en.md) Just a few lines of code can complete the inference of the Semantic Segmentation module, allowing you to easily switch between models under this module. You can also integrate the model inference of the the Semantic Segmentation module into your project. Before running the following code, please download the [demo image](https://paddle-model-ecology.bj.bcebos.com/paddlex/imgs/demo_image/general_semantic_segmentation_002.png) to your local machine. ```python from paddlex import create_model model = create_model("PP-LiteSeg-T") output = model.predict("general_semantic_segmentation_002.png", batch_size=1) for res in output: res.print() res.save_to_img("./output/") res.save_to_json("./output/res.json") ``` After running, the result obtained is: ```bash {'res': "{'input_path': 'general_semantic_segmentation_002.png', 'page_index': None, 'pred': '...'}"} ``` The meanings of the runtime parameters are as follows: - `input_path`: Indicates the path of the input image to be predicted. - `page_index`: If the input is a PDF file, it represents the current page number of the PDF; otherwise, it is `None`. - `pred`: The actual mask predicted by the semantic segmentation model. Since the data is too large to be printed directly, it is replaced with `...` here. The prediction result can be saved as an image through `res.save_to_img()` and as a JSON file through `res.save_to_json()`. The visualization image is as follows: Visualization Image Note: The image link may not be accessible due to network issues or problems with the link itself. If you need to access the image, please check the validity of the link and try again. Related methods, parameters, and explanations are as follows: * The `create_model` method instantiates a general semantic segmentation model (here using `PP-LiteSeg-T` as an example), with specific explanations as follows:
Parameter Parameter Description Parameter Type Options Default Value
model_name The name of the model str None None
model_dir The storage path of the model str None None
device The device used for model inference str It supports specifying specific GPU card numbers, such as "gpu:0", other hardware card numbers, such as "npu:0", or CPU, such as "cpu". gpu:0
target_size The resolution used during model prediction int/tuple None/-1/int/tuple None
use_hpip Whether to enable the high-performance inference plugin bool None False
hpi_config High-performance inference configuration dict | None None None
* The `model_name` must be specified. After specifying `model_name`, the built-in model parameters of PaddleX are used by default. If `model_dir` is specified, the user-defined model is used. * The `target_size` is specified during initialization to set the resolution for model inference. The default value is `None`. `-1` indicates that the original image size is used for inference, and `None` indicates that the settings from the lower priority are used. The priority order for parameter settings is: `predict parameter > create_model initialization > yaml configuration file`. * The `predict()` method of the general semantic segmentation model is called for inference and prediction. The parameters of the `predict()` method are `input`, `batch_size`, and `target_size`, with specific explanations as follows:
Parameter Description Type Options Default Value
input Data to be predicted, supports multiple input types Python Var/str/list
  • Python Variable, such as image data represented by numpy.ndarray
  • File Path, such as the local path of an image file: /root/data/img.jpg
  • URL Link, such as the network URL of an image file: Example
  • Local Directory, the directory should contain data files to be predicted, such as the local path: /root/data/
  • List, elements of the list should be data of the above types, such as [numpy.ndarray, numpy.ndarray], [\"/root/data/img1.jpg\", \"/root/data/img2.jpg\"], [\"/root/data1\", \"/root/data2\"]
None
batch_size Batch size int Any integer 1
target_size Image size during inference (W, H) int/tuple
  • -1, indicating inference using the original image size
  • None, indicating the settings from the lower priority are used. The priority order for parameter settings is: predict parameter > create_model initialization > yaml configuration file
  • int, such as 512, indicating inference using a resolution of (512, 512)
  • tuple, such as (512, 1024), indicating inference using a resolution of (512, 1024)
None
* The prediction results are processed as `dict` type for each sample, and support operations such as printing, saving as an image, and saving as a `json` file:
Method Description Parameter Parameter Type Parameter Description Default Value
print() Print the result to the terminal format_json bool Whether to format the output content with JSON indentation True
indent int Specify the indentation level to beautify the output JSON data, making it more readable. This is only effective when format_json is True 4
ensure_ascii bool Control whether to escape non-ASCII characters to Unicode. When set to True, all non-ASCII characters will be escaped; False retains the original characters. This is only effective when format_json is True False
save_to_json() Save the result as a file in json format save_path str The file path for saving. When it is a directory, the saved file name will match the input file name None
indent int Specify the indentation level to beautify the output JSON data, making it more readable. This is only effective when format_json is True 4
ensure_ascii bool Control whether to escape non-ASCII characters to Unicode. When set to True, all non-ASCII characters will be escaped; False retains the original characters. This is only effective when format_json is True False
save_to_img() Save the result as a file in image format save_path str The file path for saving. When it is a directory, the saved file name will match the input file name None
* Additionally, it also supports obtaining the visualization image with results and the prediction results through attributes, as follows:
Attribute Description
json Get the prediction result in json format
img Get the visualization image in dict format
For more information on using PaddleX's single-model inference API, refer to the [PaddleX Single Model Python Script Usage Instructions](../../instructions/model_python_API.en.md). ## IV. Custom Development If you seek higher accuracy, you can leverage PaddleX's custom development capabilities to develop better Semantic Segmentation models. Before developing a Semantic Segmentation model with PaddleX, ensure you have installed PaddleClas plugin for PaddleX. The installation process can be found in the custom development section of the [PaddleX Local Installation Tutorial](../../../installation/installation.en.md). ### 4.1 Dataset Preparation Before model training, you need to prepare a dataset for the task. PaddleX provides data validation functionality for each module. Only data that passes validation can be used for model training. Additionally, PaddleX provides demo datasets for each module, which you can use to complete subsequent development. If you wish to use private datasets for model training, refer to [PaddleX Semantic Segmentation Task Module Data Preparation Tutorial](../../../data_annotations/cv_modules/semantic_segmentation.en.md). #### 4.1.1 Demo Data Download You can download the demo dataset to a specified folder using the following commands: ```bash wget https://paddle-model-ecology.bj.bcebos.com/paddlex/data/seg_optic_examples.tar -P ./dataset tar -xf ./dataset/seg_optic_examples.tar -C ./dataset/ ``` #### 4.1.2 Data Validation Data validation can be completed with a single command: ```bash python main.py -c paddlex/configs/modules/semantic_segmentation/PP-LiteSeg-T.yaml \ -o Global.mode=check_dataset \ -o Global.dataset_dir=./dataset/seg_optic_examples ``` After executing the above command, PaddleX will verify the dataset and collect basic information about it. Once the command runs successfully, a message saying `Check dataset passed !` will be printed in the log. The verification results will be saved in `./output/check_dataset_result.json`, and related outputs will be stored in the `./output/check_dataset` directory, including visual examples of sample images and a histogram of sample distribution.
๐Ÿ‘‰ Verification Result Details (click to expand)

The specific content of the verification result file is:

{
  "done_flag": true,
  "check_pass": true,
  "attributes": {
    "train_sample_paths": [
      "check_dataset/demo_img/P0005.jpg",
      "check_dataset/demo_img/P0050.jpg"
    ],
    "train_samples": 267,
    "val_sample_paths": [
      "check_dataset/demo_img/N0139.jpg",
      "check_dataset/demo_img/P0137.jpg"
    ],
    "val_samples": 76,
    "num_classes": 2
  },
  "analysis": {
    "histogram": "check_dataset/histogram.png"
  },
  "dataset_path": "seg_optic_examples",
  "show_type": "image",
  "dataset_type": "SegDataset"
}

The verification results above indicate that check_pass being True means the dataset format meets the requirements. Explanations for other indicators are as follows:

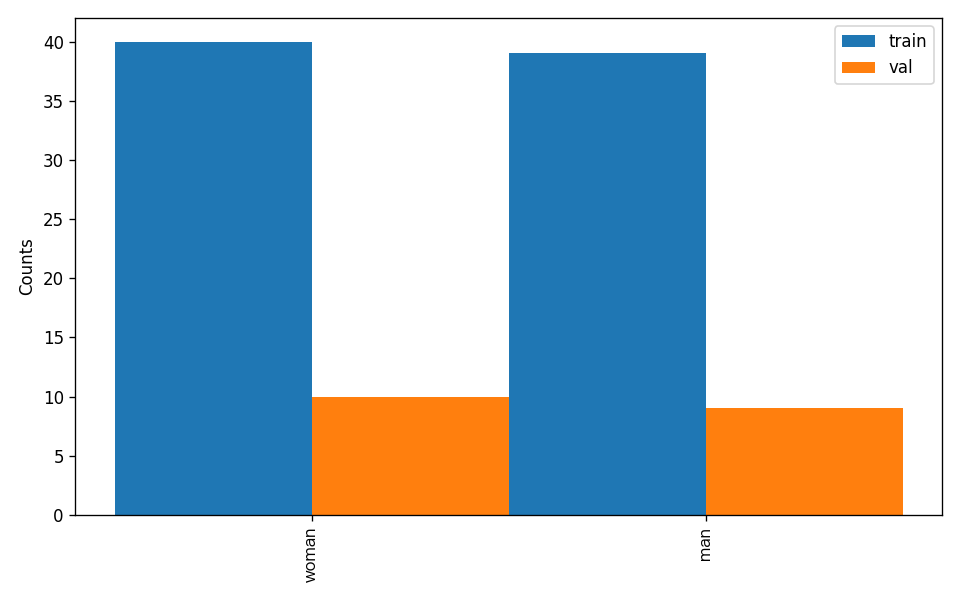
The dataset verification also analyzes the distribution of sample numbers across all classes and plots a histogram (histogram.png):

#### 4.1.3 Dataset Format Conversion/Dataset Splitting (Optional) (Click to Expand)
๐Ÿ‘‰ Details on Format Conversion/Dataset Splitting (Click to Expand)

After completing dataset verification, you can convert the dataset format or re-split the training/validation ratio by modifying the configuration file or appending hyperparameters.

(1) Dataset Format Conversion

Semantic segmentation supports converting LabelMe format datasets to the required format.

Parameters related to dataset verification can be set by modifying the CheckDataset fields in the configuration file. Example explanations for some parameters in the configuration file are as follows:

For example, if you want to convert a LabelMe format dataset, you can download a sample LabelMe format dataset as follows:

wget https://paddle-model-ecology.bj.bcebos.com/paddlex/data/seg_dataset_to_convert.tar -P ./dataset
tar -xf ./dataset/seg_dataset_to_convert.tar -C ./dataset/

After downloading, modify the paddlex/configs/modules/semantic_segmentation/PP-LiteSeg-T.yaml configuration as follows:

......
CheckDataset:
  ......
  convert:
    enable: True
    src_dataset_type: LabelMe
  ......

Then execute the command:

python main.py -c paddlex/configs/modules/semantic_segmentation/PP-LiteSeg-T.yaml \
    -o Global.mode=check_dataset \
    -o Global.dataset_dir=./dataset/seg_dataset_to_convert

Of course, the above parameters also support being set by appending command-line arguments. For a LabelMe format dataset, the command is:

python main.py -c paddlex/configs/modules/semantic_segmentation/PP-LiteSeg-T.yaml \
    -o Global.mode=check_dataset \
    -o Global.dataset_dir=./dataset/seg_dataset_to_convert \
    -o CheckDataset.convert.enable=True \
    -o CheckDataset.convert.src_dataset_type=LabelMe

(2) Dataset Splitting

Parameters for dataset splitting can be set by modifying the CheckDataset fields in the configuration file. Example explanations for some parameters in the configuration file are as follows:

For example, if you want to re-split the dataset with a 90% training set and a 10% validation set, modify the configuration file as follows:

......
CheckDataset:
  ......
  split:
    enable: True
    train_percent: 90
    val_percent: 10
  ......

Then execute the command:

python main.py -c paddlex/configs/modules/semantic_segmentation/PP-LiteSeg-T.yaml \
    -o Global.mode=check_dataset \
    -o Global.dataset_dir=./dataset/seg_optic_examples

After dataset splitting, the original annotation files will be renamed to xxx.bak in the original path.

The above parameters also support setting through appending command line arguments:

python main.py -c paddlex/configs/modules/semantic_segmentation/PP-LiteSeg-T.yaml  \
    -o Global.mode=check_dataset \
    -o Global.dataset_dir=./dataset/seg_optic_examples \
    -o CheckDataset.split.enable=True \
    -o CheckDataset.split.train_percent=90 \
    -o CheckDataset.split.val_percent=10
### 4.2 Model Training Model training can be completed with just one command. Here, we use the semantic segmentation model (PP-LiteSeg-T) as an example: ```bash python main.py -c paddlex/configs/modules/semantic_segmentation/PP-LiteSeg-T.yaml \ -o Global.mode=train \ -o Global.dataset_dir=./dataset/seg_optic_examples ``` You need to follow these steps: * Specify the `.yaml` configuration file path for the model (here it's `PP-LiteSeg-T.yaml`,When training other models, you need to specify the corresponding configuration files. The relationship between the model and configuration files can be found in the [PaddleX Model List (CPU/GPU)](../../../support_list/models_list.en.md)). * Set the mode to model training: `-o Global.mode=train` * Specify the training dataset path: `-o Global.dataset_dir` * Other related parameters can be set by modifying the `Global` and `Train` fields in the `.yaml` configuration file, or adjusted by appending parameters in the command line. For example, to train using the first two GPUs: `-o Global.device=gpu:0,1`; to set the number of training epochs to 10: `-o Train.epochs_iters=10`. For more modifiable parameters and their detailed explanations, refer to the [PaddleX Common Configuration Parameters Documentation](../../instructions/config_parameters_common.en.md). * New Feature: Paddle 3.0 support CINN (Compiler Infrastructure for Neural Networks) to accelerate training speed when using GPU device. Please specify `-o Train.dy2st=True` to enable it.
๐Ÿ‘‰ More Details (Click to Expand)
### 4.3 Model Evaluation After model training, you can evaluate the specified model weights on the validation set to verify model accuracy. Using PaddleX for model evaluation requires just one command: ```bash python main.py -c paddlex/configs/modules/semantic_segmentation/PP-LiteSeg-T.yaml \ -o Global.mode=evaluate \ -o Global.dataset_dir=./dataset/seg_optic_examples ``` Similar to model training, follow these steps: * Specify the `.yaml` configuration file path for the model (here it's `PP-LiteSeg-T.yaml`). * Set the mode to model evaluation: `-o Global.mode=evaluate` * Specify the validation dataset path: `-o Global.dataset_dir` Other related parameters can be set by modifying the `Global` and `Evaluate` fields in the `.yaml` configuration file. For more details, refer to the [PaddleX Common Configuration Parameters Documentation](../../instructions/config_parameters_common.en.md).
๐Ÿ‘‰ More Details (Click to Expand)

When evaluating the model, you need to specify the model weight file path. Each configuration file has a default weight save path. If you need to change it, simply append the command line parameter, e.g., -o Evaluate.weight_path=./output/best_model/best_model.pdparams.

After model evaluation, the following outputs are typically produced:

### 4.4 Model Inference and Integration After model training and evaluation, you can use the trained model weights for inference predictions or Python integration. #### 4.4.1 Model Inference To perform inference predictions via the command line, use the following command. Before running the following code, please download the [demo image](https://paddle-model-ecology.bj.bcebos.com/paddlex/imgs/demo_image/general_semantic_segmentation_002.png) to your local machine. ```bash python main.py -c paddlex/configs/modules/semantic_segmentation/PP-LiteSeg-T.yaml \ -o Global.mode=predict \ -o Predict.model_dir="./output/best_model" \ -o Predict.input="general_semantic_segmentation_002.png" ``` Similar to model training and evaluation, the following steps are required: * Specify the `.yaml` configuration file path of the model (here it's `PP-LCNet_x1_0_doc_ori.yaml`) * Set the mode to model inference prediction: `-o Global.mode=predict` * Specify the model weights path: -o Predict.model_dir="./output/best_accuracy/inference" Specify the input data path: `-o Predict.inputh="..."` Other related parameters can be set by modifying the fields under Global and Predict in the `.yaml` configuration file. For details, refer to PaddleX Common Model Configuration File Parameter Description. Alternatively, you can use the PaddleX wheel package for inference, easily integrating the model into your own projects. #### 4.4.2 Model Integration The model can be directly integrated into the PaddleX pipeline or into your own projects. 1. Pipeline Integration The document semantic segmentation module can be integrated into PaddleX pipelines such as the [Semantic Segmentation Pipeline (Seg)](../../../pipeline_usage/tutorials/cv_pipelines/semantic_segmentation.en.md). Simply replace the model path to update the The document semantic segmentation module's model. 2. Module Integration The weights you produce can be directly integrated into the semantic segmentation module. You can refer to the Python sample code in [Quick Integration](#iii-quick-integration) and just replace the model with the path to the model you trained. You can also use the PaddleX high-performance inference plugin to optimize the inference process of your model and further improve efficiency. For detailed procedures, please refer to the [PaddleX High-Performance Inference Guide](../../../pipeline_deploy/high_performance_inference.en.md).